Exercise and Fitness

Training For Youth Athletes (Part 2)


“This is what we should have been learning in gym class.”

- Essentially every person I’ve trained

Part 1 of this blog post focused on the immediate benefits of a training and recovery program for youth athletes. Part 2 is going to focus on the long term benefits, and the possible consequences of lacking this information, with examples that most parents of youth athletes will be able to relate to. Because there is a consensus among the adult clients at Foundation Personalized Fitness that gets straight to the heart of this post. Every single one of them has experienced injury or pain due to muscle imbalances, stiffness, and poor movement patterns. And every one of them has said at one point or another that they wish they had learned these concepts of proper weight lifting and self care recovery when they were younger. And a key element when beginning to understand proper lifting mechanics is a term we like to use called form.

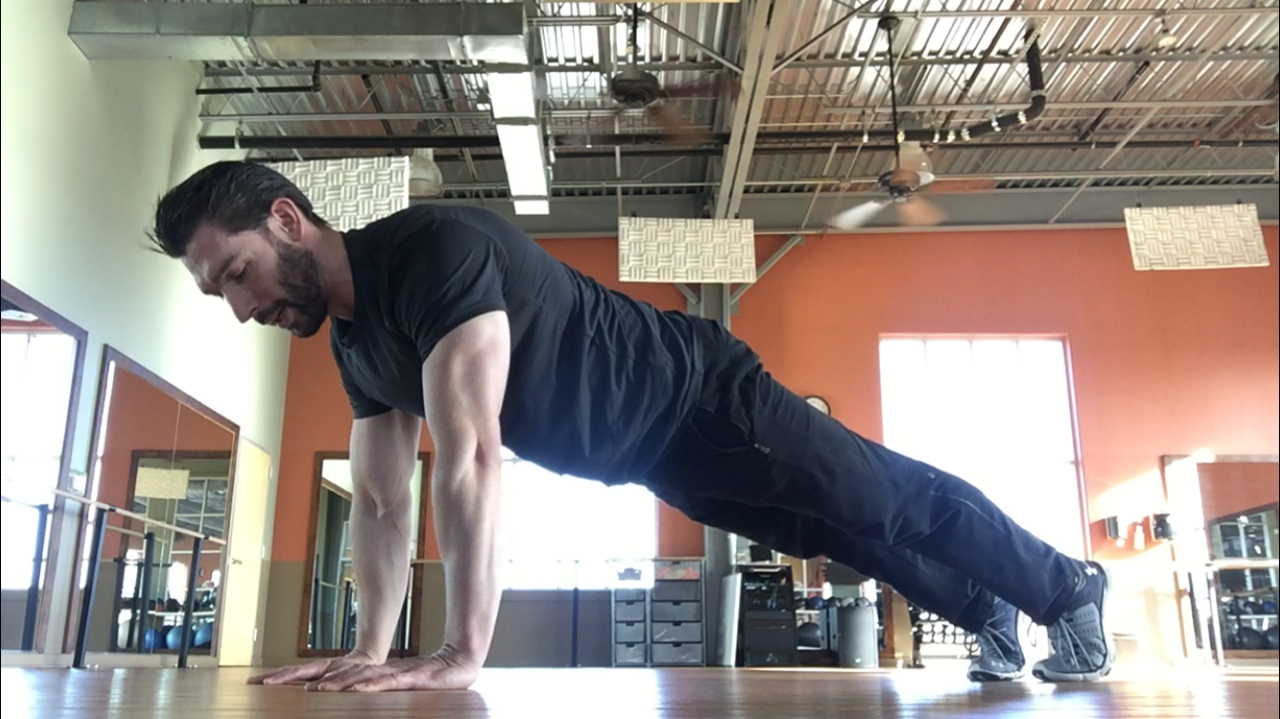
Form is the word we use to describe the specific movement that should be performed when doing a certain exercise or lift. It is deeply tied to the principles of physics, and how the joints in our body act as lever systems. But form is about more than just how we’re supposed to move, it’s an awareness of our center of gravity and how we maintain stability, control, and balance as we move.

When adults come to us with pain issues, movement and balance issues, or the looming threat of surgery, the thing that I can never stop myself from thinking is: if only they had been taught from the beginning how vital it is to understand the fundamentals of movement patterns. Probably the most frustrating part of it all is that this is a completely straightforward and understandable concept, all it takes is someone explaining it and helping you understand how to apply it. When a person understands how to maintain their center of gravity when they squat, or how to stabilize their position and “organize” their muscles when they set up for a deadlift, this allows them to protect their joints and spine and avoid injury. And understanding these concepts and being able to implement them directly translates into how well you run, jump, kick, throw, pick things up, and even hold your posture. For adults it can mean eliminating low back pain, hip, knee, and foot pain, and building up strength that will keep you out of the doctors office and feeling strong and capable. Learning this when you’re young is something that you’ll value and be grateful for the rest of your life.

But the issue is the same over and over again. When we’re younger our bodies are able to withstand and (generally) recover from the negative effects of poor or improper movement patterns and lifting techniques. You may feel a little joint or muscle pain that seems like it’s more than just your typical soreness from working out, but it tends to go away after a day or two. Therefore, there’s no unmistakable indicator that’s telling you something is wrong and needs to be addressed. So we continue these patterns and lifting styles throughout our lives. It isn’t until we’re older and our bodies no longer have the ability to recover so easily that we start to experience the more chronic pain caused by our poor movement patterns. We often attribute this to simply “getting old”, and why shouldn’t we? If you have been exercising and lifting weights the same way your whole life and it’s never been a *major* issue before, then why would you attribute it to that now? And therein lies the problem.

Imagine all the countless aches and pains that could have been avoided, and the time spent going to the doctor to figure out why this or that hurts, simply by understanding from a young age how to move and lift properly. People comment a lot about the failure of our medical system being treatment based rather than preventative. I recently heard it referred to as “sickcare, not healthcare”. Well, what I am suggesting is about as preventative as it gets. And this is just one aspect of why youth athlete training should be compulsory. In the immediate sense it becomes practical because when our athletes train effectively and efficiently, they become stronger, avoid pain and injury, and ultimately their ability to access and generate power allows them to be the best athlete they can be. Which is what every athlete is looking for. And in the long term it is instilling an awareness of how important movement really is, and practicing recovery work to prevent muscle stiffness that can lead to joint pain and injury.

This issue is undeniable and I witness the negative impact of this lack of education every single day, in both the adults that come in to fix whatever pain they’re experiencing and get stronger, as well as in our youth athletes that simply weren’t able to recover so easily from poor movement mechanics and have now developed an injury or chronic pain. This not only deprives them of their full potential as athletes, it potentially sets them up for a lifetime of chronic pain and recurring injury if the underlying problem isn’t addressed and replaced with a proper understanding of movement and training, along with a recovery plan that focuses on reducing stiffness and increasing blood flow to overworked tissues. Please contact us with any questions you might have about personal training for youth athletes. This is something that will not only benefit them now, but have a lasting, lifelong impact.

Contact Us

Training For Youth Athletes (Part 1)

“The cure for bad mechanics is good mechanics…working on basic motor control.”

- Dr. Kelly Starrett

Two of the best books I have ever read on the constantly expanding topic of exercise and physical fitness were written by Kelly Starrett. He is a consistent source of discovery and progress in a field that, until about 20 years ago, had catered almost exclusively to power lifters and body builders, and the methods being practiced were basically hit or miss traditions that were just being passed down. In a recent interview he discussed the need for youth athletes to optimize their motor control skills, but also recognize the importance of understanding and having a plan for dealing with the aches and pains that come with being an athlete. He signed off with his usual exuberance and enthusiasm by saying, “this is the first generation where we can make it better”.

While a lot of these concepts aren’t new, they are just now barely making it into the mainstream. Terms like self-myofascial release, soft tissue restoration, compression therapy, and blood flow restriction therapy are still unfamiliar to many people, and yet these are the current methods that are producing the most significant results in protecting athletes from chronic pain and injury. And too often there seems to persist a belief that our younger athletes are somehow immune to the muscle tension and strain that exercise and high level activity can put on their joints and tendons. When in fact most likely the opposite is true. Our young athletes are still growing, meaning that the stresses put on their bones, tendons, joints, and ligaments are actually increased due to the constant, and sometimes dramatic, growth changes. And let’s add these into the mix:

  • less body awareness; therefore difficulty in recognizing a potential problem “hot spot” in their muscles.

  • sitting for long hours in the classroom; this creates the same “poor position” that adults face who sit in front of a computer all day.

  • outside of their sport young people today are typically less active (cell phones, video games, television, classroom) meaning that ultimately they go from poor, passive positions straight into high level activity.

If we look at our elite athletes, at least the ones who are taking care of themselves properly, they’re going to be getting deep tissue work done, massages, they have a physiologist, a nutritionist, they have a recovery plan, and experts to advise them. While this isn’t practical or realistic for young athletes it also isn’t necessary. Kids are generally pretty flexible to begin with. They haven’t spent as much time as most adults living in these poor positions that lead to stiffness, which then inhibits range of motion, which then essentially becomes a lack of flexibility. The main thing that a lot of these young athletes are lacking, and then continue to lack as adults later on, is the understanding and ability to organize their movements, to create and maintain a neutral spine, and to implement a recovery routine that addresses soft tissue work and mobility. To put it simply:

  • poor positions (sitting for long periods, slouching over a phone, etc.) create stiffness in the muscles.

  • stiffness then reduces range of motion.

  • but ROM = mobility, and mobility means being comfortable in more demanding positions.

Through training that puts an emphasis on stability and control, and a recovery plan that focuses on reducing stiffness and improving blood flow, we get athletes that are more prepared and capable of performing at the top of their abilities for the entire season, and can easily transition from one sport to another. Because now our youth athletes are safer when they move. They know how to decelerate, move laterally, and reduce the force on their joints when jumping and landing, as well as keeping their hips and core engaged, breathing properly, and maintaining a neutral spine. This is the type of training that we emphasize at Foundation Personalized Fitness, because there’s nothing that takes you out of competition faster than an injury.

Our athletes are taught the proper mechanics for squat and deadlift and how this directly translates to their running and their ability to quickly generate power and stability, as well as their ability to comfortably function at end ranges of motion. They are also taught the importance of properly warming up to ensure that stiffness or tight spots will not interfere with their performance or lead to pain, and how post workout stretching and recovery routines can reduce and even eliminate soreness and fatigue, leading to greater gains and a higher quality of athletic ability.

Please reach out to us with any questions or to inquire about a free consultation. Contact Us

Put the Pull Back in Your Pull-Up

Pull-ups might be the hardest body weight exercise that exists.

Not only does it challenge your back, arms, and shoulders, but the demand on your core is significant. Once you’re holding onto that bar and your feet leave the floor, gravity begins pulling your entire body down from your hands. Your torso is now being stretched and lengthening by your own body weight, constricting your abdomen’s free space, leaving your lungs struggling to fill up with air against the weight of your own body and gravity pulling everything down and tight.

I’ve considered for a while now that maybe one of the reasons people struggle with doing pull-ups is not just the lack of strength in being able to perform a pull-up, but from the panic signals being sent to their brain when the lungs suddenly begin to struggle to get oxygen. There are not many exercises that place this type of demand on your body and mind. So, we’ve come up with a routine to address building up both the physical strength needed to do a pull-up, as well as the mental fortitude needed to control yourself in that position.

Negative Pull-up

A good way to get started is by practicing the negative part of the pull-up, a.k.a. the lowering down part. This will get you more familiar and comfortable with your pull-up position while building up strength. You can use a Smith Machine or an adjustable squat rack and set the bar at shoulder height. From here get your hands just wider than shoulder width apart with your feet on the ground. Using a 5 count, slowly lower yourself down toward the ground, trying to use your legs as little as possible to support you. Once at the bottom use your arms and legs to stand back up again, and try to repeat for 10-12 reps, or as many as you’re capable of doing.

Seated Pull-up

Another good way to get better at pull-ups using a modification with a Smith Machine or squat rack is to do pull-ups from a seated position on the floor. This will be a more traditional form of pull-up except that you will primarily be lifting only your upper body weight. Adjust the height of the bar so that you can sit cross legged underneath it and you can reach up and grip the bar at arm’s length away.

Some key points to remember.

You want to follow a straight path up and down from the bar. The bar should line up over the top of your chest or just under your collar bone. And when you pull yourself up to the bar, you should follow that straight path up to the bar. You want your torso and your elbows to stay as vertical as possible. When you pull you should not have your elbows flaring out behind you, but pointing straight down toward the floor, and your hips should stay under you as well, not pitching out in front of you so you feel like you’re leaning back. This is where your core strength and control will come into play. Again, aim for 10-12 reps here or as many as you’re capable of doing.

Lat Pull Down

A very straight forward but effective way to build up basic pull-up strength is by doing lat pull downs, which basically mimics the movement of a pull-up. Try doing both the traditional wide grip, but also the closer, underhand grip, like doing a chin-up, to build up biceps as well. This obviously requires access to a lat pull down machine. But the principles are the same. Keep yourself and your elbows vertical and pull the bar to the top of your chest, just under your collar bone with your elbows tucked to your sides. Keep your shoulders from rounding forward and think about your shoulder blades pulling down and together in the back. This exercise will not do a lot for your core but it will most definitely build up your back, shoulder, and arm strength.

Rows

Another tool in your toolbox for getting stronger in general that will aid your pull-ups is doing any type of row. Seated row, TRX row, inverted row, bent over row, cable row, etc. The act of positioning and stabilizing yourself and accessing your back and arm muscles is key to being able to do pull-ups, but it’s also extremely important for back strength in general. Just remember to put your focus on your back muscles. Your shoulder blades and back muscles should be engaged and moving as you do rows, otherwise you’re just using your arms and basically doing a weird bicep curl. Posture and position are going to be key with all of these. Do not try to “over pull” so your elbows are way back behind you and your shoulders are rolled forward. Focus more on the pull starting from the back of your shoulders, and when you finish your shoulder blades should be pulled together and your chest and shoulders should be up and open, with the effort being on the muscles of your back.

Part of getting comfortable with your pull-up position is going to simply be getting used to the feeling of gravity pulling on you from that bar, so practice gripping and hanging from the bar. See if you can hang there, but then retract your shoulder blades down and together and engage your grip.

So rather than “hanging” from the bar you are actually holding yourself in position with control.

This is where you can practice breathing in the tight space of your abdomen as well has learning to control the small but deliberate movements of your shoulder blades. This will increase your grip strength but also get you more comfortable with that feeling of gravity dragging your torso down making it harder to get a good breath.

Grip Strength

If you notice that grip strength is more than a small issue for you try doing a couple of sets of Farmer Carries in between other exercises. These are pretty straight forward. Grab a pair of heavy dumbbells, and with a straight back and engaged arms, shoulders, core, and hips simply carry them around the gym until your grip begins to give. When it does just put the dumbbells down, give your hands and forearms a quick rest and then do it again. These can be worked into any exercises and be used as an active recovery until your grip strength improves.

Assisted Pull-ups

Lastly you will need to begin practicing your actual pull-up by using a resistance band for assistance. By this point you should be comfortable with the form of your pull-up and have attained the grip strength necessary to hold yourself on the bar. Find a band that provides enough support where you can do between 5 and 15 reps. Attach the band to the bar and use a box, step, or bench in order to safely get your foot into the band before you step off and practice your pull-up. Once you get comfortable with these it’s time to get rid of the band and try a full body weight pull-up, and by this point you should notice a significant increase in your strength and your ability to perform a pull-up. Thanks for reading, and please follow up with any questions!

Ask A Question

Plantar Fasciitis: Steps to Fixing It (Hint: It's not insoles)

Probably the most overworked and underappreciated part of our bodies is our feet.

If you’ve ever experienced that pain in your heel when your foot first hits the floor in the morning then you probably know what I’m talking about. It’s hard to walk because with each step the part of your body that touches the floor is sending up shockwaves of pain. So you end up limping around, searching for those “arch support” insoles to stick in your work heels or dress shoes. They’re supposed to help but for some reason the problem never seems to go away.

Without even knowing it you’re making the problem worse.

Our feet are the last part of our body that comes into contact with the ground, with our entire body weight bearing down on them. All day, every day. No other part of our body has so much constant demand put on it. Given that fact you’d think we would want our feet to be the toughest and strongest they can be. I’m going to let you in on a little secret.

Big tobacco, fossil fuels, for-profit insurance; these scandals pale in comparison to the marketing lies of Big Footwear.

Just kidding, those industries are far, far worse, but big footwear is pretty bad. Every day they show you ads and tell you about the next generation of shock absorbing, arch supporting, physics defying footwear that is going to make you run faster and longer and charge up more stadium stairs than you ever have in your life. Because you gotta protect your feet, right? They need cushioning and support, and a huge sole that dampens the damaging impact of the ground. Your feet are soft, delicate flowers that need to be wrapped in a protective layer of cushioning and shock absorption. Hopefully at this point you don’t need me to tell you that’s complete nonsense.

Who makes it through the jungle alive, Indiana Jones, or the pampered prince sitting on his fluffy pillows being fed grapes by his servants?

If you want to avoid foot pain and all the things that go with it then you want your feet as strong and tough as possible. Plantar Fasciitis can be caused by a myriad of things. Stuffing your feet into tight, cramped shoes all day is one of them. Sitting all day is another one. Even standing for long periods can cause this problem. But the biggest problem is not knowing how to address these issues to preserve the strength of your feet. When you shove your feet into tight, uncomfortable shoes for long periods, the muscles in your feet get tight and cramped up themselves. This can lead to your calves getting tight also. As anyone who has had plantar fasciitis knows, your feet hurt, but if you rub your calves, they feel pretty tight and beat up too.

When you sit all day your hamstrings become shortened and your glutes inactive. This can also lead to sciatica but it can also severely impact plantar fasciitis. To put it simply: you’re inactive. And even if you go to the gym or do some form of exercise, chances are you’re not undoing the damage you’ve done from sitting all day, or having your feet cramped up in terrible shoes, by working the knots out of your feet, foam rolling and stretching your calves, stretching your hamstrings, and then doing some glute bridges or something to get your glutes active before you start your routine. It also helps to activate the tibialis muscle, which is the muscle on your shin and helps support the arch in your foot. You can do this by putting some type of weight or resistance around your toes and then flexing your toes up toward you against the resistance so your shins warm up.

In conclusion.

So there you have it. Ditch the awful, tight, constrictive shoes, along with the ones that pad your feet up in some kind of pillow. Have at least one day a week, or maybe the evenings when you’re done with work, be a barefoot session where you walk around with no shoes or flipflops or anything on your feet. If you have plantar fsciitis or even just foot pain in general, use a foot massage ball (my favorite small massage ball), or a rope at the gym, or a frozen water bottle, or anything really to break up the tension in your feet. Then foam roll your calves, stretch your calves, stretch your hamstrings, activate your glutes and tibialis, and you should be good to go. Depending on the severity of the condition you might have to do this routine for a week or two before the foot pain goes away.

If you have any questions feel free to hit us up in the link below!

Ask A Question

Push-ups, Planks, and Modifications

Struggling with push-ups is a real thing, just ask my sister. She was recently asking me why they were so hard, and how you ever get better at them. But when she described what she was doing it was either struggling to do even just two or three regular plank position push-ups where her core would collapse and her elbows would flare out, or doing a ton from her knees that were super easy.

The answer, which is true for most exercises, is finding modifications.

It’s also important to understand the positions you’re attempting to achieve and finding ways to isolate them individually. The problem with attempting to “muscle through” standard push-ups when you don’t actually have the strength to do them is that your form is going to be awful. You’re just going to reinforce an improper movement pattern since you can’t achieve the correct one, or you’re going to hurt yourself, and maybe even both. So here are some ideas for how to progress your push-ups, as well as brush up on the movement itself.

Let’s quickly look at the Push-Up itself.

The start position for a standard push-up is a plank. Arms are straight, hands are under your shoulders, head is in neutral position, hips and core are engaged, and your body should be relatively straight from your shoulders to your heels. You don’t want your back arching so your stomach is falling to the floor, but you also don’t want your hips hiked up behind you, so your butt is sticking up in the air. A solid plank should be the first position you are able to get into. If you can’t get into this position then doing a push-up is a tomorrow problem.

Pretty much every exercise has a start position and a finish position. If you can get into both of those positions then the movement between the two should be relatively easy.

The focus then becomes on moving more weight, doing more reps, or increasing the tempo. The finish position for a push up is elbows bent and creating about a 45 degree angle between your body and elbows from your armpits, and your body braced a few inches above the floor. Hips and core are still fully engaged. If you could draw a straight line from one thumb to the other it should run across the middle of your sternum, or what some refer to as nipple line. A push-up is just alternating between these two positions in a controlled, stable manner. “Screwing” your hands into the floor (generating tension with the floor by applying clockwise pressure with the right hand and counterclockwise pressure with the left) will help stabilize your shoulder by engaging your lats and shoulder muscles as the head of the humerus bone rotates in the socket.

Now let’s get to the tips and modifications.

·        Planks – If you struggle to do a plank then this is where you begin. You need to have the arm, shoulder, core, and chest strength to be able to maintain a plank if you want to be able to do a push-up.

·        Incline Position Push-Ups – If you have access to a squat rack then you can set the bar to the height you need in order to be able to perform a push-up while practicing your form. With this method, “screwing” your hands in becomes “bend the bar. You can also try using a chair or the back of a couch, or anything that elevates your hands off the ground so you can work on building up your strength.

·        Negative Position Push-ups – With this you will start in plank position and slowly lower yourself to the ground. From there, bend your knees and put them on the ground with your feet in the air and do a knee push up back to the top. Get back into plank position and slowly lower yourself down again. These will most likely be difficult but will help a lot in building strength.

·        Finish Position Hold Push-ups – These start with you laying flat on the floor, hands just outside your chest, elbows 45 degrees off your body, and thumb line going across the center of your sternum. Push your self about 3 inches off the floor and try to hold the finish position of a push-up for 3 seconds, aiming for 10-12 reps. The time and reps should increase as you get stronger.

·        Up Downs – This method is essentially alternating between a forearm plank and a straight arm plank. Start in a forearm plank and then alternate between the arm that helps push you up into a straight arm plank.

·        Plank Walks – Any kind of movement in plank position will help strengthen your arms, shoulders, chest, and core. You can plank walk side to side, forward and backward, rotate in a circle, anything you want, get creative. As long as you’re in control of your movement and maintaining a stable plank position. I suggest doing this as a timed exercise for 30-60 seconds.

·        Dumbbell Press and Tricep Extensions – A very straightforward way to build up the strength you need for a push-up is to work the muscles that are part of the movement. Doing flat bench or incline bench dumbbell presses will build up the push muscles in your chest, shoulders, and arms. And then you can specifically target your triceps by doing tricep extensions to both increase their strength, which will help with your push-up, but also tone your arms. Toning bonus FTW!

 It’s likely that there are plenty more modifications out there besides these, and maybe there are even some that you come up with yourself. Be consistent, keep practicing, and make note of your progress so you know when to challenge yourself more. It may seem daunting at first, maybe even impossible, but you will definitely see progress and will end up fully capable of doing a push-up.

What Does It Mean to Hip Hinge: An Introduction to Deadlift

A Breakdown of Hip Hinge and Deadlifting

Successfully executing a deadlift is akin to having all the stars align. For anyone who has struggled with this form and mastered it, you probably know exactly what I mean. For whatever reason this movement seems to come very easily to some people, but for others it is weeks, if not months, of practice. Part of this problem is due to tight hamstrings or hips, leading to difficulty in sensing the lengthening and shortening of that muscle group. Another obstacle can be underactive glutes, or a lack of glute strength, that also leads to difficulty in sensing the movements and engaging with the muscle group. Both of these are pretty straightforward fixes: stretch, foam roll, activate, and strengthen these muscle groups. The more active muscle fibers you have operating, the easier it is for your brain to communicate with them and vice versa.

Outside of these basic obstacles though is probably the biggest one of all: understanding what it means to hip hinge. I’ve mentioned before that sometimes terminology can sound good, but not carry any actual meaning for people. In other words, if someone asked you to explain what it means to hip hinge, could you? If not, or if you just want to double check your own understanding, keep reading.

Hip Hinge. It sounds simple enough. But a combination of tight or weak muscles, and a less than complete understanding of how to produce this movement can lead to a lot of frustration. So let’s break it down in the simplest terms. The main area being affected are your hips, so there’s the hip part. And in the same way a hinge on a door functions that gives us the hinge part; your hips are hinging. In my view the confusion mostly tends to rise out of one particular area: your back. Let me quickly explain.

If you simply looked at a hinge on a door you would see two flat, metal pieces, joined in the middle by intersecting, round pieces that form a cylindrical tube, with a pin that inserts into that tube to hold the pieces together. The center tube with the pin through it allows the two metal pieces to pivot off of one another, so when attached to a door and the frame, the door can open and close. Right now you’re probably about to stop reading this article because, duh Jamie, we know how a door works. But hear me out.

With your body, your thighs are one metal plate, your back is the other, and your hips are the tube in between with the pin through it. Your thighs, or more specifically the femur bone in them, are hard and strong and straight just like the metal plate. Your back on the other hand is ribs and spine, which not only is made up of interlocking vertebrae that can bend and move, but your spine itself is curved as it travels through your torso and inserts into the back of your pelvis (the SI joint). Therefore, maintaining a straight, flat back that might resemble a solid metal plate is going to depend entirely on your muscles to maintain control, stability, and straightness.


You can probably look around your local gym or almost anywhere on the internet and see people rounding their back as they perform a deadlift. This is generally a lack of awareness but can also be from a lack of strength, or trying to lift a weight that is too heavy for them. Or all of the above. The point is though: don’t be that person. Using a mirror at first is a great way to ensure that you are maintaining a straight back as you hip hinge. But beyond that it is pretty essential that you know what it feels like so you can ditch the mirror. In my view the easiest way to familiarize yourself with a hip hinge is to imagine you’re doing a hamstring stretch, except you have to keep your back completely flat and straight as you push your butt out behind you. Holding a broom stick or pvc pipe on your back as you do this and maintaining full contact with it along your back can help. As you do this you should feel the muscles of your hamstrings begin to lengthen and stretch. Stop before you get to a point where you can no longer control the stretch because the next part is important. In the same way your arm does a bicep curl, the bicep muscle lengthens when the weight is away from you, then the muscle shortens and contracts to “curl” the weight in, that’s basically how your hamstrings operate too. From that lengthened position, with your back straight and your butt pushed out behind you, pull yourself back to an upright position by contracting and shortening your hamstrings. The pull is through your glutes and hamstrings, not by arching and pulling through your low back. This is essentially a hip hinge.


While practicing this you’ll probably discover that there are various iterations of a hip hinge. Technically, when you squat you are performing a hip hinge. You load your glutes and hamstrings for stability as you lower into the squat, but then due to the flexion of your knees it becomes more of a push movement through your quads and glutes to drive back to standing. Similarly, with deadlift you might have been practicing a straight-leg deadlift in order to familiarize yourself with a hip hinge, but in order to generate more power and strength in a traditional deadlift, there is going to be some degree of flexed knees in order to create a higher concentration of overlapping muscle fibers in the hamstrings, leading to a stronger pull. If that’s confusing, think back to doing a bicep curl. If you had your arm completely straight and you put a heavy dumbbell in your hand, chances are you’re going to struggle to curl that dumbbell in from a straight arm position. But if you bent your elbow slightly and then put that same dumbbell in your hand, it would be much easier to curl it due to the extra overlap of muscle fibers. If you want to learn more about that, do a search on the actin and myosin filaments in a sarcomere.

 Hopefully this has cleared up any confusion about what it means to hip hinge and how the movement applies to lifting and really, picking up anything in general. If you can master the hip hinge and apply it appropriately to deadlift posture when picking things up, you’ll end up engaging your back in a position of stability while your glutes and hamstrings are the muscles that actually lift whatever it is you have off the floor, or out of the back of your car or truck, and basically anything of that nature. Understanding and mastering this movement will save you a lifetime of back pain and strain, and make your glutes and hamstrings strong, functional, and sexy!

Core Strength and Crunches

When basic crunches aren’t enough for your workout routine let’s look at some alternatives that will optimize your core strength and increase your balance and ability to generate power.

*And if you want to do crunches, think about your back staying straight and sitting up onto your tailbone.

By now you probably know that your core is more than just your abs.

It’s the trunk of your body that both stabilizes you and also allows you to rotate around with control. And applied correctly your core also braces your spine to protect it from any unsafe movements that could harm your central nervous system. Another thing I think is important to understand about your core is that it is the foundation that all of your extremities attach to. So while your legs allow you to run, and your arms are swinging a golf club around, these extremities attach to the trunk of your body and need its support in order to move effectively. These extremities are attempting to generate power when they do certain things, whether it’s kicking a ball, swinging a bat, or throwing a Frisbee; and the strength of your core will determine how much power they can generate and then transfer to your movement.

Planks

A staple of core strength is going to be a plank. Whether it’s performed with your hands on the ground or your forearms on the ground, a plank is a straightforward way to assess core strength. But once you’ve gotten control of your plank it’s important to start implementing the variations that will keep you getting stronger and also from getting bored. Side planks, performed on one arm or hand and with the hips facing out instead of down, are a great way to kick up the challenge level and add balance into the equation. From here you can then try tapping your hip to the ground to see if you can maintain your balance and control while moving. Try tapping your hip to the ground twice and then holding a side plank for two seconds, with a goal of being able to do this ten times on each side.

Dead Bug

Dead Bug is a great flip on the traditional plank for people who are beginners and can’t maintain a plank, but also for people who struggle with stabilizing their back and keeping it from arching or rounding. Appropriately named for the way dead bugs tend to look, you lay on your back with hips and knees bent to 90 degree angles. With your arms pointing up to the sky, hold an object against the front of your knees; a stability ball, a big pillow, whatever you can get your hands on and hold against your knees. Maintaining your back flat against the ground, extend an opposite arm and leg out away from the ball as far as you can control them before bringing them back up to the ball and switching sides. A good goal here is to be able to do this 20 times on each side.

Cable Rotations

If you have access to a cable machine then you can work on generating power as we mentioned earlier in more specific movements. In the same way you would swing a golf club or baseball bat, doing cable rotations will help you increase core strength and generate power in your movement. You will want to start off standing perpendicular to the cable machine, both hands gripping the handle and holding it at arm’s length in front of your chest. Keeping the handle out in front of your chest will help ensure that the emphasis is on your core and isn’t being taken over by your arms and shoulders. It helps to imagine that you’re in a glass tube, so you can’t rock forward or lean backward, you can only rotate around. Your goal here is to rotate your torso around pulling the cable with it and then controlling it back to the start position. Pick a weight that will allow you to do 20 to 25 reps on each side, each one mimicking the way you would swing an object, focusing on your ability to generate strength and power in that rotation.

There are probably hundreds of ways to train and strengthen your core, with crunches being just one of them. Just remember, core strength is about control and stabilizing, so you can protect your spine but also generate force. If you want to do crunches, think about your back staying straight and sitting up onto your tailbone. Rounding your back, the way most crunches are performed, is the opposite of how you want to train your body. Like always, know what you’re trying to do, focus on the muscle groups you’re trying to use, and don’t sacrifice your form and ability to keep yourself stable just to get in a few more reps. Quality over quantity will win out every time.

Nutrition 101

For many people the hardest part of achieving their fitness goal is understanding diet and nutrition.

Given the magnitude of options, information, and suggestions we are exposed to on a daily basis this shouldn’t be surprising. Typically the best thing to do is break the basic information down into “bite size” pieces. 

Before you start trying to figure out what to eat it might help to have a good understanding of where you’re at in the first place.

Resting Metabolic Rate (RMR)

There are some simple and relatively accurate formulas to figure out what your daily calories should be based on your weight and activity level. The first thing you want to figure out is your Resting Metabolic Rate (RMR). This is the number of calories that your body is burning before any physical activity. Basically this is what your body burns to keep itself running and functioning, and the equation is body weight times 10. So if you weigh 180 pounds then your RMR is 1800. From here you now want to factor in the activity level of your lifestyle in order to determine how many calories you would need to consume in order to keep your present weight. 

If you lead a sedentary life and spend most of your time sitting at a desk then you would multiply your RMR by 1.2. If you exercise occasionally, maybe once or twice a week, multiply your RMR by 1.3. If you exercise regularly every week, say 2 to 4 times, then multiply your RMR by 1.4, and if you exercise regularly every week up to 5 times then multiply by 1.5. So let’s say your RMR is 1800 and you’re sitting at a desk all day with no exercise. The calories you would need to consume in order to maintain your weight would be 2160 (1800x1.2). Typically a person’s goal is weight loss so the effort from here would be to put yourself in a calorie deficit in relation to this number. And a calorie deficit is exactly what it sounds like: setting your calorie intake to below the amount your body needs to maintain its current weight. As we discuss caloric deficit and how that breaks down it is important to note that the minimum calorie recommendation per day for men is 1800 calories and the minimum for women is 1500. It is thought that much below this is unsafe and should be monitored by a doctor.

Obviously these numbers are only relevant if you begin tracking what you eat, so pick your favorite food tracking app and give it a try. My suggestion would be to simply track what you normally eat for a few days so you can take the calorie number the app is telling you and compare it to the number you got from your equations based on your personal weight and activity level. Are you in the basic range of what you would eat to keep your present body weight? Or are you significantly over that number, meaning that your body weight is steadily increasing? This is important information to have in order to get an understanding of what type of changes are going to be required of you in order to take control of your body composition. If your goal is weight loss then you are going to want your daily intake of calories to be under the total calories that you got from multiplying your RMR by your activity level. 

An example of How to figure out your daily calories.

Say your RMR is 1800 and you have a sedentary lifestyle which registers as a 1.2 on the activity scale, giving you your weight maintenance calorie intake of 2160. Now let’s say that after 1 week of tracking your meals, snacks, and other sources of calories (yes, alcohol counts) you discover that your average daily calories is around 2400. Your goal at this point is pretty straightforward: get your daily caloric intake down below 2160. As I mentioned before, men can safely reduce their daily calories to 1800 and women can safely reduce their daily calories to 1500. Now comes the hard part. Remember, I only said what you needed to do was straightforward, I never said accomplishing it was easy. But here are some tips that can help.

Portion control is always a useful tool.

People tend to eat more than they realize, leading to a higher calorie count. Simply watching the size of the portions you put on your plate can have a huge impact on reducing calories. Maybe even try using a smaller plate so less food fits on it.

 My next recommendation is something I can’t stress enough.

Read the nutrition label on the back of the foods you buy and learn what it means.

This is an invaluable tool and it’s absolutely free. The three main things you need in your meals are protein, carbs, and fats. And where they come from can play a huge role in weight management. Opting for lean protein will help reduce your fat consumption, because while you need fats, you don’t need a lot of them if you’re looking to lose weight. So stick with chicken breast, lean turkey, egg whites with maybe just one yoke, and other sources of protein that keep the fat content to a minimum. And speaking of fats, try to have your sources of fat come from things that offer additional benefits, like certain vitamins and nutrients. Different types of nuts are great sources of fat but also magnesium and other vital nutrients. Sunflower butter and peanut butter fall into these categories. Just be careful of the serving size and be aware of what that translates into for your fat intake. Avocados and beans are another great source for fat but there’s a catch, especially with beans. Beans also contain a decent amount of carbs, so you have to be sure that you’re calculating the protein, fat, and the carbs that you’re getting from a serving of beans. This is where using a food tracking app comes in handy, it will do all that work for you.

Since you could write an entire book about diet and nutrition, and many have been, I’ll wrap it up here, and leave you with this. Veggies are carbs, but they only contain a small amount, therefore you can eat a lot of veggies to help hit your carb levels. This will help you accomplish two things: the first is you will be more full and less likely to feel hungry because you can eat more veggies, and second, veggies do not have a lot of calories, so it won’t push you over your calorie goals when you eat a lot of them. For a flip side example, a regular portion of pasta has a sizable amount of carbs as well as calories, therefore you can’t eat as much without risking going over your daily calorie and carb goals, which might leave you feeling hungry later. Veggies give you healthy carbs and nutrients and won’t break the bank on your calorie intake.

It’s important to remember, weight loss is not an exact science and it might take time to figure out what works for you. The goal is to create a healthy relationship with food and to understand your body better and what fuels it to perform and feel its best. But as long as you can keep yourself in a calorie deficit and focus on what and how much you put in your body, this should be a very reliable method for weight loss. But ultimately, any nutrition plan should be practical and doable. In other words, if it isn’t something that you’re going to be able to maintain then you have to come up with a plan that you can maintain. You don’t have to give up all the foods you like eating, but being more responsible and better informed on basic nutrition can go a long way. Feel free to contact us with any questions!

Ask A Question

What Is Corrective Exercise?

We use the term “Corrective Exercise” pretty regularly and promote its importance and value. But like with a lot of commonly used terms this one shouldn’t become a catch-all phrase that no one really knows the meaning of. Because in fact it’s quite straightforward.

If I had to summarize corrective exercise in one sentence, I’d say it’s like doing physical therapy rehab for your whole body except you don’t need to injure yourself or have had surgery in order to start doing it.

The name can be slightly misleading since the word ‘exercise’ typically leaves the impression of doing something that’s active and requires a lot of effort and movement. While this can sometimes be the case in later stages of Corrective Exercise in order to reorient the worked on muscles to the rest of the muscular system, the usual structure of Corrective Exercise is generally slow, controlled, deliberate movements intended to affect a specific muscle or small group of muscles.

These days a lot of us have occupations that require us to sit for long periods, often in front of a computer, with our heads sticking out like a turtle toward the screen and our shoulders rounding forward and down toward the key board. Or maybe it’s the complete opposite, and you have to stand most of the day, either in front of a computer, a spreadsheet, or moving from one workstation to the next. Either way, repetitive movement can reek havoc on the body. People sitting for long periods end up with neck and shoulder pain, low back pain, and probably hip pain. People standing for long periods also end up with hip pain, and you can probably add in knee and foot pain as well. Technology may make our lives easier, but it certainly doesn’t help us maintain the physically functional levels that our bodies are intended for.

And this is where the problem can start. With the intention of staying healthy and active, we go to the gym, or take a fitness class, ride a bike or follow along to an exercise video at home. While these are great intentions, most of us are entering into these activities still carrying the effects of our job’s physical demands. Pain is not some arbitrary sensation that can be ignored because you don’t want it, or avoided if you just don’t do certain things. There is a reason why your hip, or knee, or back, or shoulder or whatever hurts. Sitting and standing for long periods affects our muscles and puts excessive demand on other muscles not meant for it. This is where Corrective Exercise becomes extremely beneficial.

If you know that sitting for long periods causes a shortening of hip flexor and hamstring muscles and deactivates your glutes, and that poor posture and weakened core muscles put strain on your lower back, then it should be logical that correcting those muscle imbalances is of paramount importance. If you don’t then your exercise routine is basically just grinding away at those same muscles that are under strain already, usually making the pain worse and eventually leading to injury. Corrective exercise uses a two part approach; the first is to understand your daily patterns to predict where you’re most likely to be tight, weakened, and under or over active, and the second is to actually observe your basic movements to confirm the predictions and figure out how limited or severe the situation may be.

From here the goal of Corrective Exercise is to help restore functional muscle movements by lengthening shortened muscles, strengthening weakened muscles, and educating on the circumstances that created this problem in order to stay healthy and prevent it from happening again. In a lot of ways it can be compared to the use of physical therapy after surgery or a serious injury. Muscles that have been injured or have ceased their intended function due to lack of use are worked on until proper strength levels are achieved and pain is eliminated and full functional movement has been restored.

Send us an email with any questions and sign up for a free consultation! Thanks for reading!

Ask A Question

Intro To Running

Going for a run is one of the most common forms of exercise.

Whether it’s for stress relief, weight loss, competition or just enjoyment, we have friends, family, and clients that run on a regular basis. So we thought we’d offer some insight on how to approach running and ways to avoid injury so you can get the most out of your run, no matter what inspires you.

One of the main things we want to impress upon you is the fact that everyone is or has the potential to be a natural born runner. But running has to be treated like any other physical activity, you have to train for it. If you’re someone who goes running periodically, meaning you take months off at a time, and in between you randomly go for an aggressive 3 mile run, then it shouldn’t surprise you when your feet and shins hurt the next day and your hips feel like they’re locked in a vice. If you hadn’t done bench press for 2 months I doubt you would go into the gym and attempt your last PR. And if you did you’d be paying for it. So running is no different. If you want to be a healthy runner you need to put in the time to practice and prepare your body for the demands you are asking of it. This includes taking time in the beginning to acclimate your body and giving it time to get strong enough to handle the 3 or 5+ mile run you might just be casually trying to do every few weeks or couple of months right now.

But regardless of whether you are a casual runner or someone who starts every day with a morning run, we want to offer some tips for keeping those joints working smoothly and those muscles operating at their optimal capacity.

If you break down the movement of running it’s pretty straightforward: it’s the constant flexion and extension of multiple joints while balancing from foot to foot. It may not feel that way when you’re moving so quickly through the motion but feet, ankles, knees, hips, and shoulders are all repeatedly flexing and extending. In order to meet the demands of this locomotion it helps to prep your body and check the mobility of each of these joints. A great way to check this is by performing a bodyweight squat. This will test your ability to comfortably flex and extend both your hips and knees, as well as test the flexion of your ankles, which is referred to as dorsiflexion.

Some questions to ask yourself.

Can you comfortably perform a proper squat? Are you able to maintain hip tension and stability through the entire range of the squat? Are you able to maintain balance and keep your whole foot on the ground with center of gravity in the front of the heel and an arch in the middle? Being able to do this will ensure that all of your energy is being spent on an effective run, and not wasted on trying to keep your balance or hold yourself up due to a lack of range of motion or hip drive.

With regard to mobility the last two things you want to consider are back tension and your ability to have proper shoulder extension. Sitting all day often leads to low and mid back tension and poor posture, which can easily affect your ability to rotate through the trunk and create core stability while running. This will most likely reveal itself with pain or stiffness in the low and mid back as you run.

While performing a dozen or so squats is a great way to warm up and check your mobility, also consider adding in a couple minutes of jump rope. This will get your feet and ankles ready for your run, warm up your balance, and give you a chance to engage your back and lats for good posture, as well as working on maintaining a neutral hip position with engaged glutes. Once you know your glutes are fired up and you have good mobility through your joints, do several short distant sprints and jogs to get everything primed and ready, and then start your run.

In no way is this a comprehensive list of all the things you should or need to be doing. It is more of a guideline as to how you should be thinking about running and how you approach getting yourself in the healthiest physical state to have successful and pain free runs. Please feel free to contact us with any questions or set up a consultation to discuss any particular obstacles or issues you might need help with. Thanks for reading!

 Ask A Question